
It might be said that there are a few things that you will find common among most homesteaders.
One of those things would certainly be chickens.
The other thing would probably be apple cider vinegar.
I’ll admit that I didn’t really start to understand the many benefits of ACV until just over the past couple years. And while I’m admitting things, I’ll also let you know that it really wasn’t until last year that we started taking an interest in making our own.
But when we started to weigh the cost of buying organic ACV at the store vs the amount used on the homestead, it quickly made sense that we should make our own.
Of all the ferments that we have done, ACV is pretty simple. But because it requires open air instead of using an air lock, it can get a little tricky, especially the first couple times. Open air can foster mold, and we have lost our fair share of ACV batches in the past.

Making Apple Cider Vinegar
To get started, it helps to have a little understanding of the fermentation process and what is actually happening on a microbial level.
Acetobacter bacteria is the active microbial in ACV, and it feeds on the sugars in the brine, converting them to alcohol. This is the GOOD kind of bacteria. Exposure to oxygen over time will convert the alcohol to vinegar, which is why its important to allow air flow into your ferment and to let your ACV sit for quite a long time in a dark space.
Science is cool, right?
What you’ll need
- Plenty of apple scraps, apple skins and apple cores
- Gallon sized jar
- Glass weight
- Organic sugar
- Distilled water
Make the brine
To make the brine you will soak your apple scraps in, add 1tbs sugar per 1 cup distilled water and let dissolve completely. For a one gallon jar, you’ll need around 8 cups of brine.
Make your apple cider vinegar
Stuff your clean jar full with your apple scraps and cores. Press the scraps down into the jar tightly with a wooden spoon to. Allow about 3 inches of space at the top of the jar.
Now pour your brine over the apple scraps, allowing 2 inches at the top. If you have organic apple cider vinegar on hand (especially with the mother), add a splash to your brine. This will jump start the bacteria growth.
It’s important that all of your scraps stay beneath the brine, or else you’ll have mold form on the surface. Mold will ruin your ACV. To keep the scraps submerged, use a glass weight.
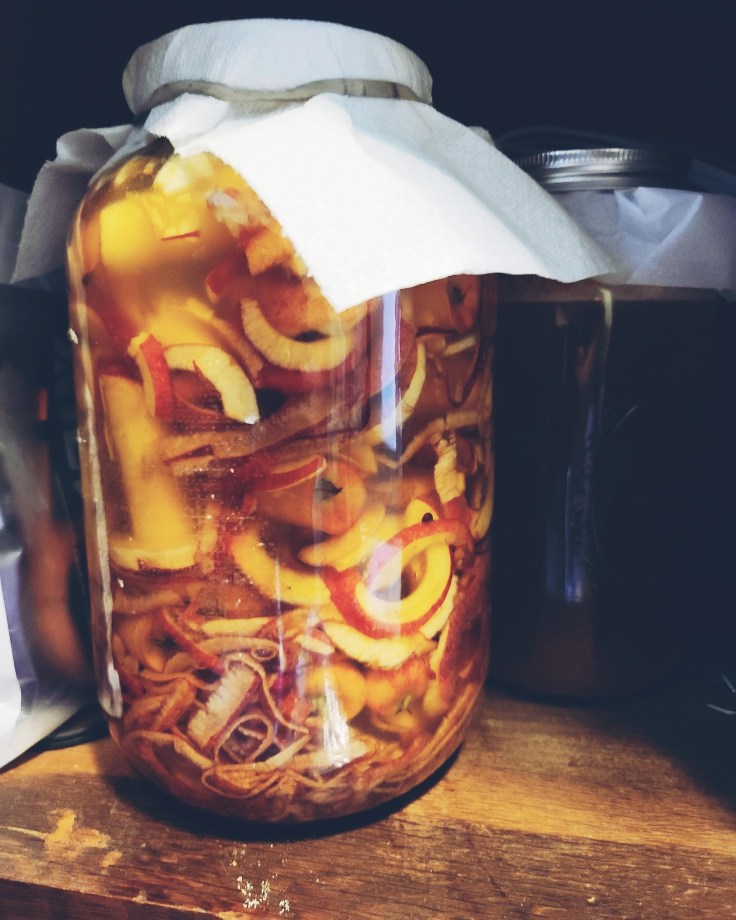
Use a folded paper towel or coffee filter to cover the opening of your jar. You want air flow to encourage bacteria growth, so its important not to cover the jar with a lid. A paper towel or filter will keep the fruit flies out. Simply snap a rubber band around the jar opening and make sure there are no small openings for bugs to get through.
Store your ACV in a dark cabinet for 3-4 weeks. Check it regularly to make sure mold isn’t forming.
After 3-4 weeks, strain out the scraps and add to your compost pile. Then return the fluid to your jar. Your ferment should have a nice sweet vinegar scent to it now. Add a fresh paper towel to the jar opening and return the fluid back to the cabinet for at least another couple weeks. Taste regularly until your ACV is just right.

Common problems when making apple cider vinegar
There are a few things to watch out for when making ACV.
The first is mold. Mold will form on any ferment that isn’t properly submerged underneath the brine, or that has been left too long in the jar. Usually, mold on ACV will be black and will form in splotches across the surface and along the glass, although sometimes it can be white or greenish. If you see mold on your ACV you’ll need to throw it away and start again.
The second thing you might run into is kahm yeast. This is a white substance that can form across the surface of your brine. While it is commonly mistaken for mold, its not a mold at all but rather an aerobic yeast that forms when available sugars are used up and the pH drops due to lactic acid formation. It’s harmless, but it can affect the taste of your ACV. I’ll usually just skim it off with a spoon.
A few key things to remember for bulletproof apple cider vinegar
Keep everything clean – Make sure to clean your jar and utensils well with hot water and soap. No need to sterilize. Clean tools is the first step to a healthy ferment.
Don’t use metal – The fermenting process reacts badly to metal products, so best to stick with glass jars and paper towels.
Use distilled water – Chlorinated water is a death sentence to the bacteria necessary in the fermenting process. Using distilled water is the best way to ensure a successful ferment.
Apple variety – Any apples will work, but its best to use organic apples. No need to use whole apples either. Scraps and cores work just fine. So next time you’re making apple sauce, hold back the scraps and make some healthy, homemade apple cider vinegar.


Does your vinegar form a scoby? Mine did.
Yes! Also called a mother. Great to use to jump start another batch of vinegar.